
Documentation
DesignCrate
Setup and user guide
Turning the designer on for a product, offering product colours, setting a printable area in real units, and getting a print-ready file off the order.
// Getting started
Install it
- In Plugins → Add New, search for DesignCrate, then install and activate it. Or download the zip from WordPress.org and upload it.
- WooCommerce must be active too.
- Edit a product and open the DesignCrate tab.
It needs WordPress 6.0 or newer, WooCommerce 7.0 or newer and PHP 7.4 or newer. Tested up to WordPress 7.1 and WooCommerce 11.2.
Turning it on for a product
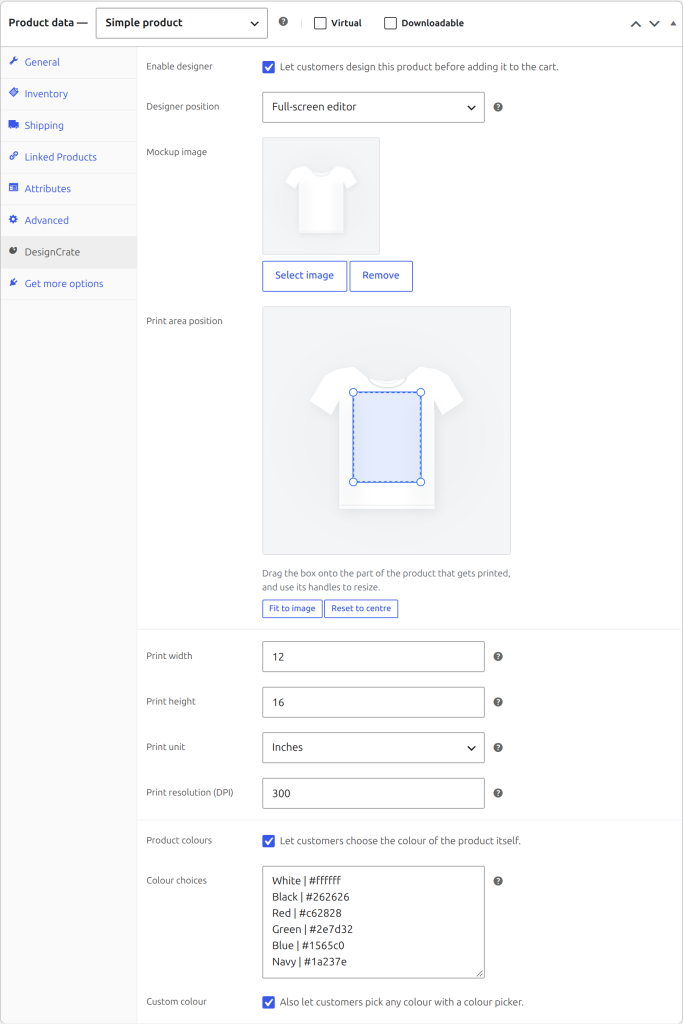
- Tick Enable designer.
- Choose a Designer position: Beside add to cart, or Full width, below the product for a much larger canvas. Block themes always use the first.
- Choose a mockup image — the picture customers design on top of. With none set, the product’s featured image is used.
- Set the print width and height, the unit and the resolution in DPI.
- Drag the print box onto the part of the product that actually gets printed, and resize it with its handles.
- Update the product, then open it on the front end.
The print box keeps the shape of the print size you set. That is deliberate: a square print area on a 12 × 16 inch product would export a square file and the print would come out wrong. Fit to image and Reset to centre are there when you want to start over.
Offering product colours
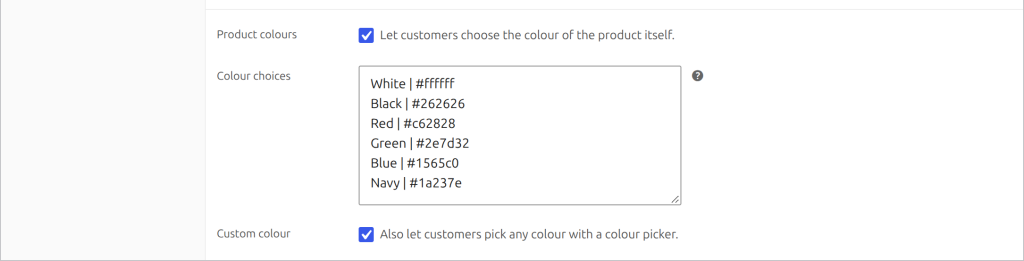
- Tick Product colours.
- List the colours you sell in Colour choices, one per line as
Name | #hex— for exampleRed | #c62828. White, Black, Red, Green and Blue are filled in to start with. - Tick Custom colour to also offer a colour picker for any shade.
- Update the product. A Product colour row appears above the design tools.
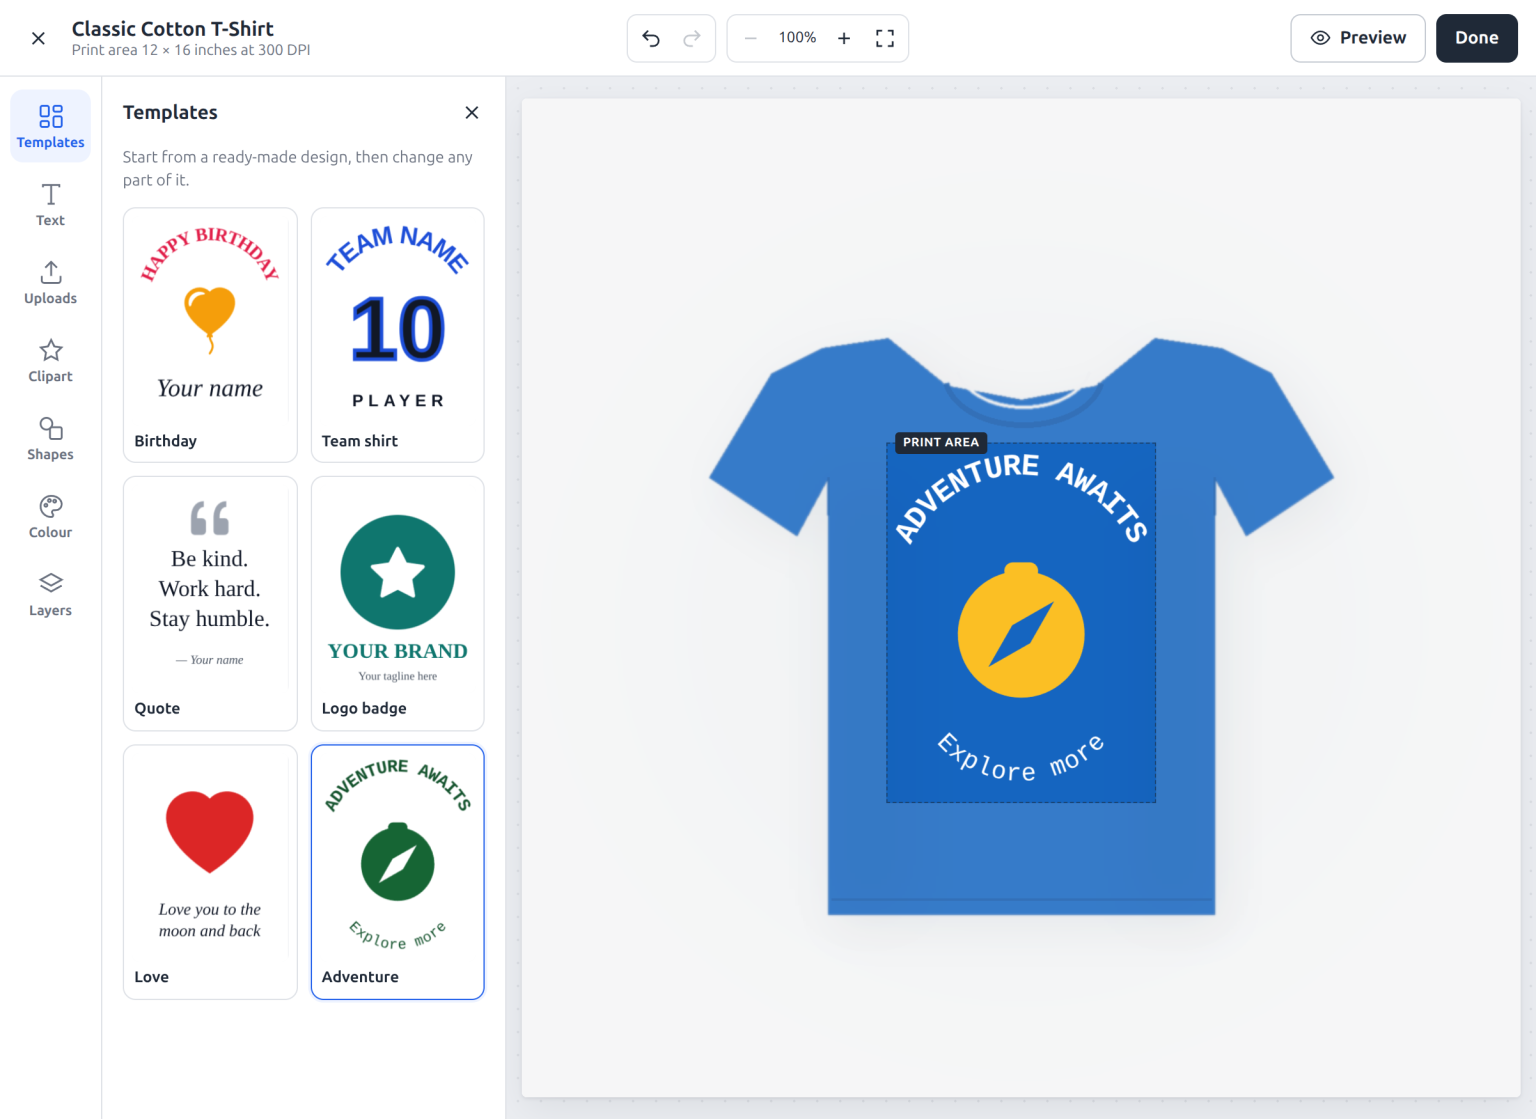
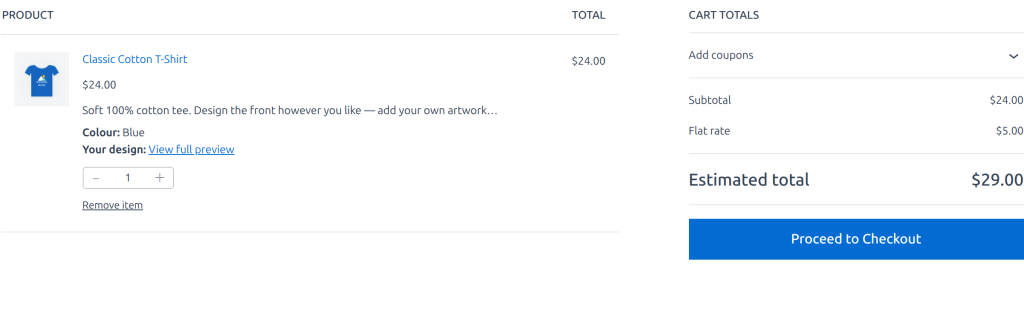
The mockup is recoloured with its folds and shading intact. It works best with a white product on a transparent background; on an opaque mockup the backdrop is detected from the image edges and left alone. The chosen colour shows in the cart and is saved on the order as Colour, with the exact hex kept too. The print file is never coloured.
// The canvas
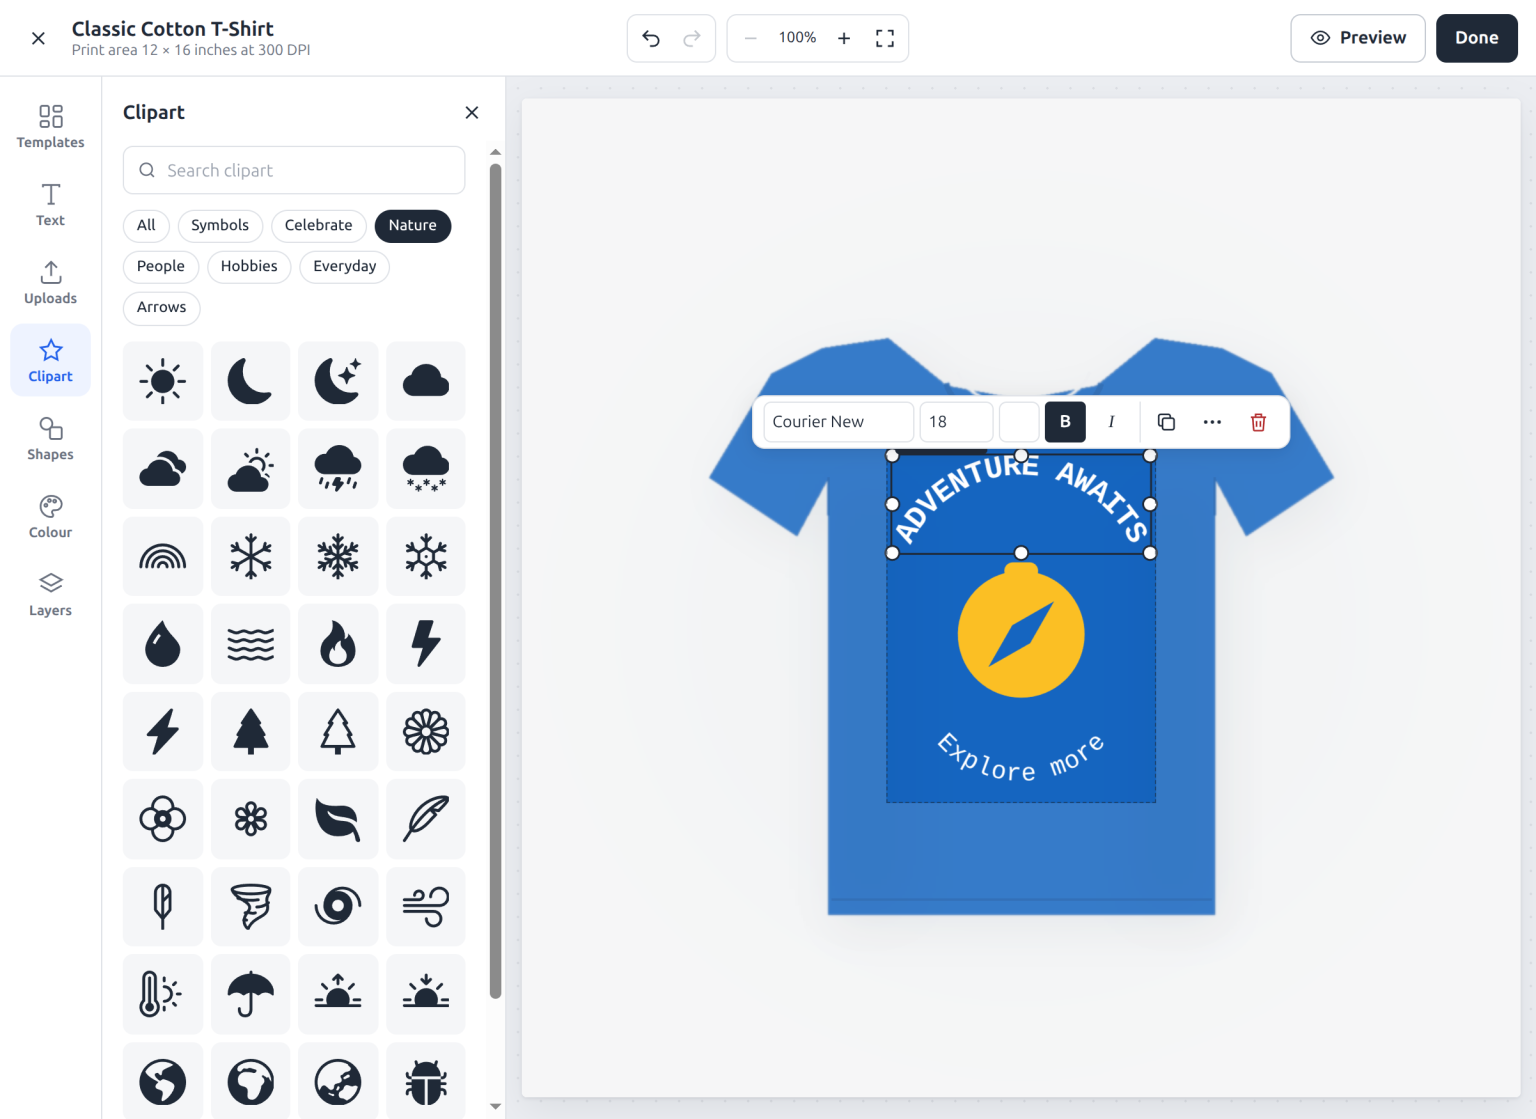
What your customers get
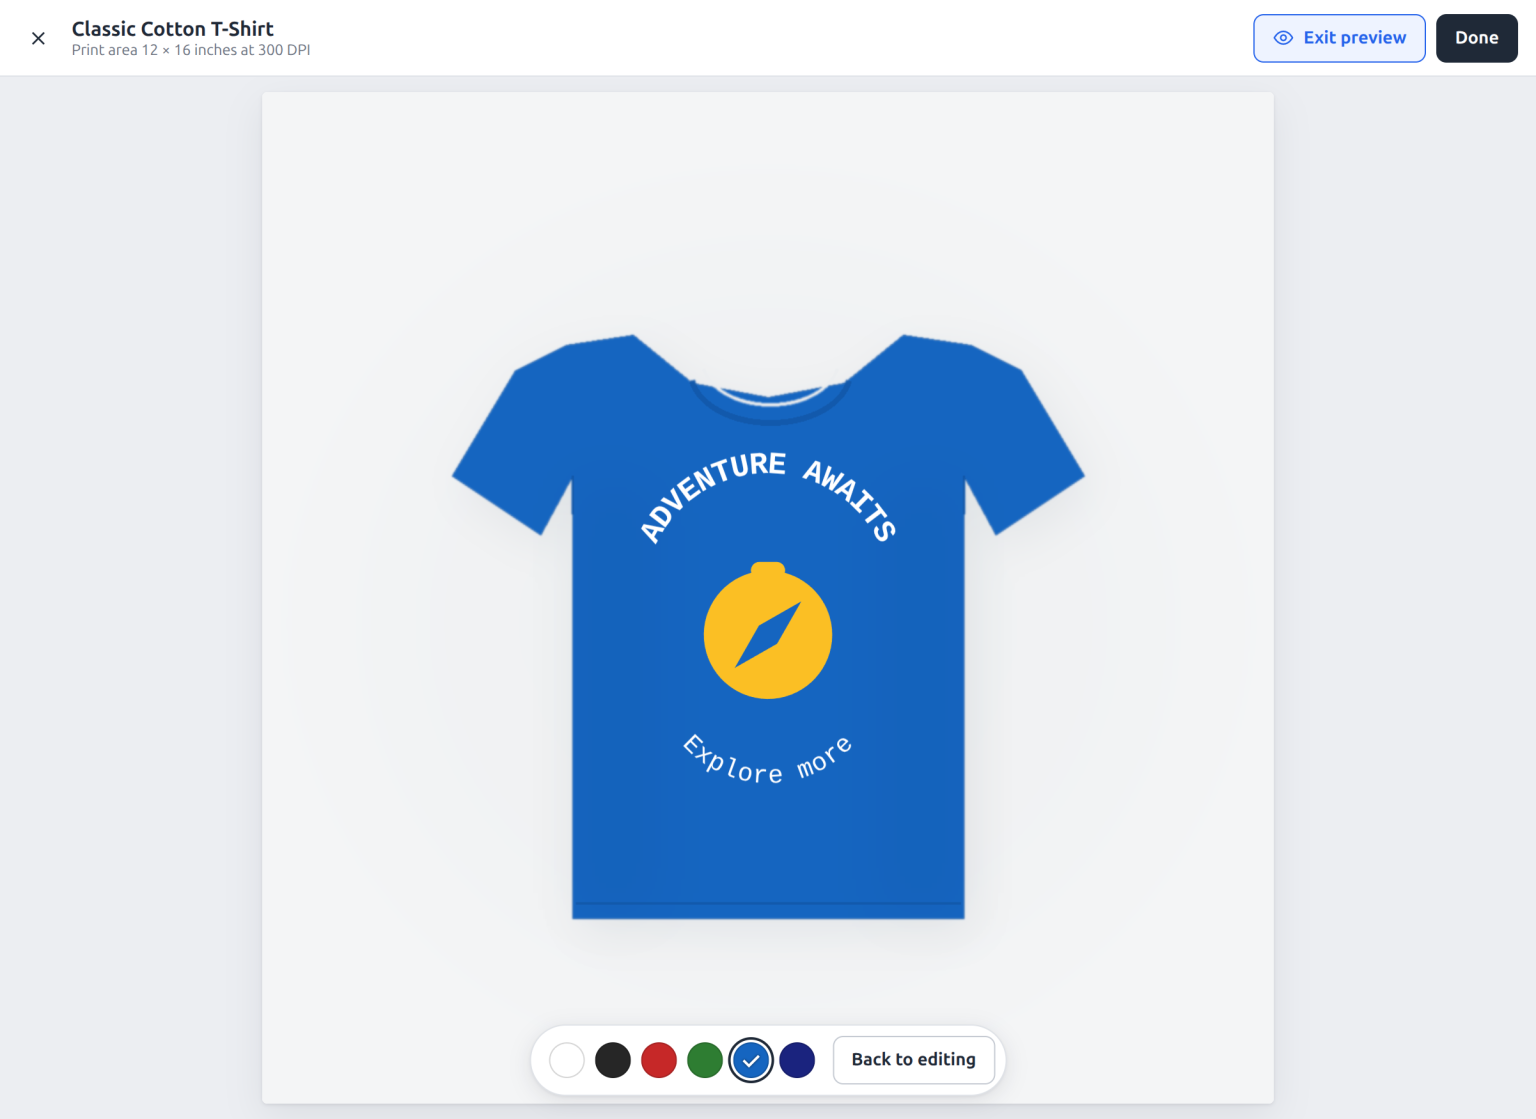
// Output
Two renders, and why it matters
Each design produces two different images. Sending the wrong one to a printer is how a product photograph ends up on a press.
A 12 × 16 inch area at 300 DPI downloads as a 3600 × 4800 pixel PNG. The size on screen never affects it.
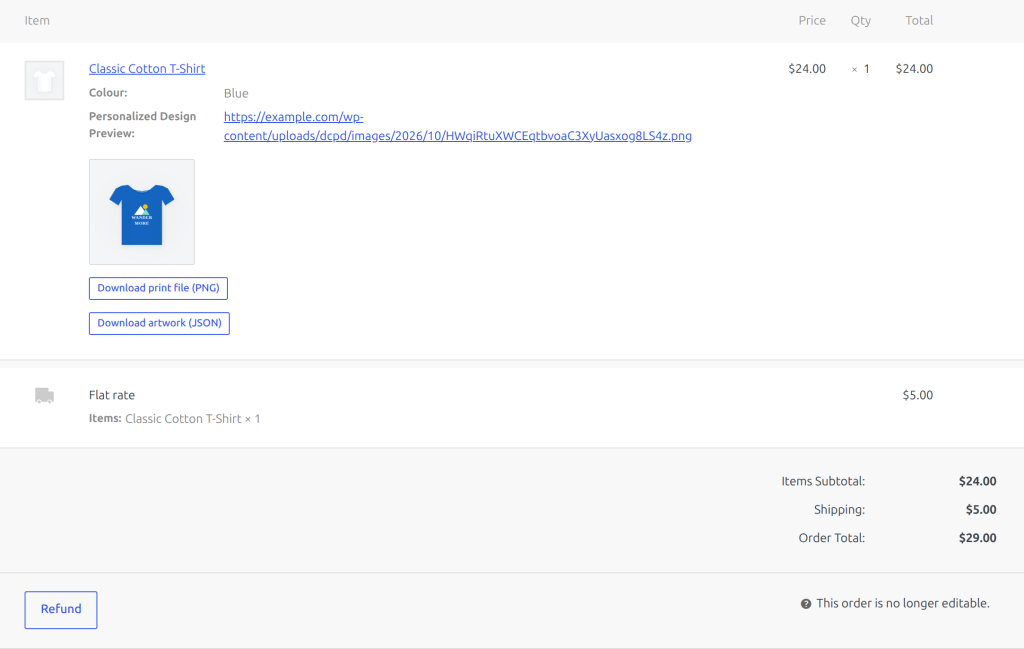
Getting the file off an order
- Open the order in WooCommerce.
- The chosen colour and the design preview sit under the line item.
- Download print file (PNG) gives you the file to print.
- Download artwork (JSON) gives you the editable design data — useful for support, useless to a printer.
// Storage
Where the files live
Everything is in your own uploads folder, under wp-content/uploads/dcpd/. Nothing is sent anywhere.
Design files are blocked from direct web access.
Only the preview images are publicly readable, because the cart and your emails have to display them.
Filenames are random, so nothing can be guessed or enumerated.
A daily task removes designs that were never ordered, two days after they were last touched.
Filters
dcpd_max_upload_bytes — change the size of image a customer may upload.
dcpd_unclaimed_design_ttl — change how long an unordered design survives.
dcpd_max_display_edge — change how large the editor canvas may be drawn on screen.
dcpd_product_colours — change the colours offered for a product.
dcpd_default_colours — change the colours a product starts with.
// FAQ
Questions
Does this send anything to an external service?
No. Artwork is stored in your own uploads folder and never leaves your server. There is no account, no API key and no per-order fee.
Can customers choose the product colour?
Yes. Turn on Product colours on the DesignCrate tab and list the colours you sell. Customers pick one above the design tools, the mockup recolours live, and the colour is saved on the order.
The canvas is small in my theme. How do I make it bigger?
Set Designer position to Full width, below the product. Customers can also hide the tools panel and zoom in up to 400%.
Does it work with the block cart and checkout?
Yes. Both the classic templates and the Store API are supported, and High-Performance Order Storage is fully supported.
Two customers ordered different designs of the same product. Will they merge into one line?
No. Each design gets its own cart line, so two different designs of the same product never collapse into a single item.
What happens to artwork if I uninstall the plugin?
Product settings are removed. Artwork attached to orders is deliberately kept, because deleting something a customer paid for would be data loss.
Will it slow down products that do not use it?
No. Scripts and styles are enqueued only on products where the designer is switched on.
Still stuck?
If something here is wrong or missing, tell us and we will fix it — then write it down for the next person.